A Digital Detox
- Simon Pugsley
- Feb 4, 2025
- 6 min read
Over the last year I’ve bought a couple of M42 lenses to use on my mirrorless camera with an adapter. I’ve also accumulated and number of old analogue SLR cameras so I thought I would try my hand at analogue film photography.

My first SLR camera was a Pentax P30n, and to be honest I didn't really invest the time to properly learn the art of taking good photos, I was just excited to get out and start shooting, mostly using the P setting.
This project has allowed me to learn the basics of film photography. My dad gave me his Zenit B and a Praktica Nova SLR, among a bag of others! The Zenit B is the most basic, no batteries required it’s fully manual, so I thought I’d start with that.
Using this made me slow down and really think about the settings, subject, and composition. Of course I could do that with my digital camera, but I don’t! Without the ability to review, there was now a cost to taking photos!
The Zenit B
My version is a 1972 edition made by the KMZ factory just outside of Moscow, this is also the same place and year the Helios 44-2 lens was made that I have. The Zenit B had about 900,000 copies made from late 60’s to early 70’s, and they used to be sold in Argos and Dixons priced around £49.99. It is fully manual, with speeds of 1/60, 1/125, 1/250 and 1/500 only, plus a bulb mode if you wanted slower speed. There are no focus aids, just the viewfinder glass and the lens focusing ring. It also has a clockwork timer to take selfies!

Film
Film is a bit more expensive now and given this was more of a test and see I went for a cheaper 135 roll of Kentmere Pan 400 black and white film. It is made by Harman which produces the Ilford Delta range, so has some quality associated with it. I chose the 400 ISO to give me flexibility in what I shoot and the fact it's a panchromatic film means it should give me a good range of tones, albeit with a bit more grain.
The first complication was loading the film, there was a fiddly little spring clip and a sprocket I had to find to place the end of the film onto before winding on. After a couple of winds, I manually set the dial to 0 in order that I could get my count of how many exposures I had taken. I was ready!

Light Meter
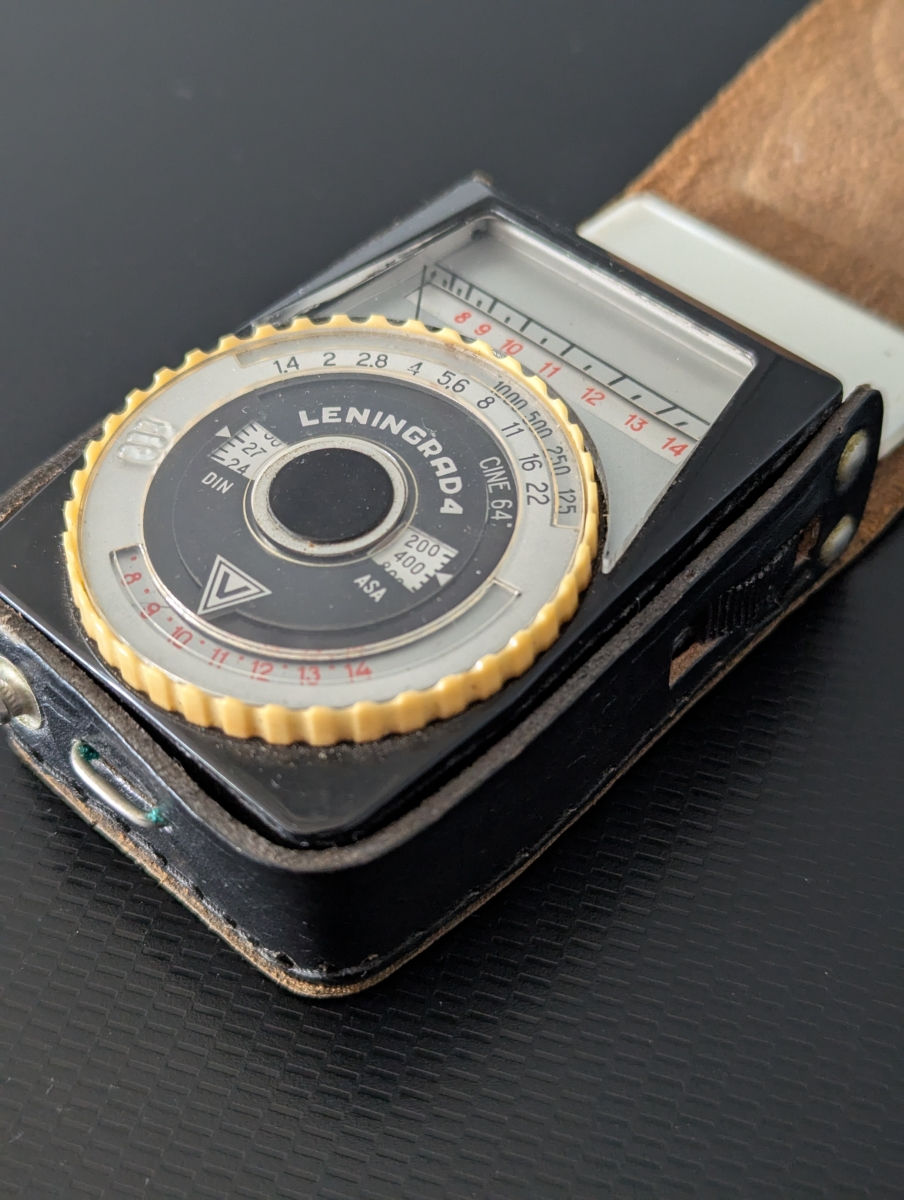
With no light meter in the camera, I used an old Leningrad4 light meter. Again all manual, I set the ISO of the film, aim the meter to what I want to photograph and the pointer will point to a number on the top scale, I then find that number on the face dial which will provided a series of f stops and speeds I can use e.g. f5.6 at 1/250 or f8 at 1/125. Effectively f5.6 to f8 is 1 stop of light, so to achieve the same light at f8 I had to reduce the speed by one stop from 1/250 to 1/125. I definitely take my digital camera light metering for granted, even if shooting manual I can still use the histogram readings to adjust the either the aperture, speed or ISO. With no output to view on the Zenit getting it right was essential.
As a backup, I downloaded an app called LUX Meter which also provides light meter readings. I did a few tests and both the Leningrad4 and the LUX were pretty close most of the time.
Lenses
In a previous blog "New lens consider old, I mean really old!” (catchy, I know!) I mentioned some of the old SLR lenses I still had and bought adapters to use them on my mirrorless camera. With the Zenit B being an M42 mount camera I was able to use the Helios 44-2 58mm, the Chinon Tapered Barrel 28mm, and the Super Takumar 150mm.

The Experience
It took 5 days to use up a roll of 36. 36 seemed such a lot, probably because I was being overly cautious. By extreme comparison my mirrorless can shoot 40 frames per second! In one walk around some woodland, I took 2 shots with the Zenit and 45 with my digital compact camera, did I really need the other 43?
Not having autofocus or any guide to confirm focus slowed me down. For most shots, I took a light meter reading, dialed in the settings, focused on the subject, realised the light had changed, took another light meter reading, changed the setting, took the picture then noted down the subject and settings used so I could review when I got the images back after being processed.
The difficulty I found dialing in the light meter values was the camera’s limited speeds of 1/60, 1/125, 1/250, or 1/500, I had some leeway with half stops in aperture values on my lenses, but not knowing how the film reacts meant I was guessing at under or overexposing.
After about 9 exposures, I took the camera out of the bag and the very flimsy latch caught on something opening the back of the camera and letting some light in! Lesson learned I closed it and sellotaped it shut!

Cost
Whilst Black and White film tends to be cheaper to buy than colour, it’s a little more expensive to process.
Kentmere and Fomapan tend to be cheaper films, and I bought rolls from Wex at £5 for a 36 film, Surprisingly, these were a fair bit cheaper than on Amazon.
When it came to processing there were lots of things to consider. Did I want prints, digital, or both. If digital only, did I want them on CD or sent via We Transfer. What resolution on the digital versions? Was postage included to both send and receive the negatives?
I chose Photo Hippo operated by Kerry and Steve in Burnley. A very simple and friendly service and a good price of £8.50 to develop 36 Black and Whites with a standard scan size 3637 x 2433 (that's medium size elsewhere). It took 10 days from posting, I used Royal Mail 48 tracked seemingly meaning tracked for the first 48 hours and after that forget it, to receiving the scans.
One roll of 36 film, postage, and processing cost a total of £16.99.

Results
I’m very pleased with the results. Other than a couple of the light leaked shots all are usable/ acceptable to me. The grain isn't too bad, with the College Grain image being the grainiest. Using the light meter made me pay much more attention to the light itself and maybe I’ll try using auto iso less in my digital camera. I’ll also consider slowing down and taking fewer shots. This is a hang up from photographing wildlife in burst mode! Whilst its free, deciding which to process and delete is not an enjoyable part of digital photography for me.
The scan sizes of 3637 x 2433 were fine and should allow at least an A4 sized print if I wanted. I haven’t edited any of these photos (other than cropping the light leaked shot), but I’m sure they’d take some light editing e.g. contrast boost.
I made a couple of mistakes, namely forgetting I’d wound the film on and then randomly pressing the button, also dialing in f11 and then mistakenly using the aperture ring as the focus and taking the shot at f2.8. And of course, accidentally catching the catch which let the light in.
I still have a roll of film to use, taking the learns from these initial shots, so I’ll look forward to that.
Overall, a worthwhile project!


Love this digital detox perspective! For anyone archiving their media before unplugging, knowing how to https://www.movavi.com/support/how-to/how-to-convert-mkv-to-mp4.html can help consolidate files into a more universal format. Your suggestion about designated tech-free hours is brilliant - it's amazing how much mental space opens up. That analog journaling tip? Game-changer. Makes me want to schedule my own screen-free weekend to reconnect with the physical world. Inspiring stuff!